Devon’s great new dollhouse begged for a closet, so I converted an unfinished wood crate we had been using for storage. I also made a blue-green closet for our 4-year-old daughter, who doesn’t know she’s getting a doll for Christmas. She also can’t read, so I’m not worried she’s going to find out here.
We had the crate, dowel and fabric flowers already, so the only cost was the paint and vines. The closet in the picture (above) is meant for 18-inch dolls, but you can easily size it down for smaller dolls.
Supplies:
Unfinished wood crate
Dowel from your local hardware store
Sandpaper
White primer
Paint (spray paint or at least 8 ounces of acrylic paint in whatever color you like)
Paint brushes in assorted sizes
Electric drill
Scrap wood
Clamps
Matte or gloss sealant
If you’re using an old crate, make sure it’s structurally sound. You can repair minor imperfections with wood filler if you want, but I left them alone. Our kids won’t care, and it’s a crate, so I embraced the rustic look. Clean the crate and sand it enough to eliminate the roughest parts. You don’t need to polish it smooth.
Measure both sides of the crate to determine where you want your dowel. It helps to have a doll hanger with clothes on it so you can make sure the hangers fit properly. Mark your spots with a pen or pencil.
Clamp a piece of scrap wood to the inside of the crate, opposite to where you intend to drill. This will give you a neater hole and prevent damage to the crate. Size your drill bit to your dowel and drill your first hole. Repeat the process for the second hole. Insert your dowel to ensure that it fits properly. If your dowel is too long, cut it with a pull saw so the edges are flush with the side of the crate. Don’t worry if it’s a little wiggly. You can fix that later.
Wipe off any sawdust. Give the crate several coats of white primer, on the inside and outside, allowing each coat to dry thoroughly before applying the next. My crate was a paint sponge, and I used the whole can of primer for this step. If you’re priming with spray paint, do this in a well-ventilated area, preferably with a good mask. Sand between coats to smooth any excessively rough parts. Prime the dowel if you intend to paint it.
Once the primer is dry and you’re satisfied you got good coverage, paint the closet and dowel with your choice of paint. I used Folk Art Chalk Blushed Pink Rose for the closet in the picture. I love the soft, ultra-matte finish. Let the paint dry, then give it a second coat. You might need a third coat and a few touch-ups.
Paint the dowel if you like. You can match it to your closet or go for contrast.
When the paint is dry, give the closet and dowel a couple coats of a matte or gloss sealant, depending on the paint you used.
Insert the dowel through the holes. Add a little hot glue or wood glue on the edges to make it more secure if it jiggles too much, but I didn’t bother. The coat of paint on the dowel made it fit snuggly.
You can call it done here or decorate it with your own touches. I used faux vines to give the closets a garden vibe, and I hid the ends of the dowels with tiny fabric flowers. You can personalize it further with paint, decals, beads, etc. Go nuts!
Disclaimer: As Amazon Associates, we earn a small amount from qualifying purchases. There’s no extra cost to you, and your purchase helps us cover the cost of running this blog. We have no business relationship with any of the companies whose products we link to.
MAKER MONDAY: Dollhouse today, bookshelf tomorrow

If you’re thinking “Holy cow, that’s a big dollhouse,” you’re right.
Devon exercised his burgeoning woodworking skills on this house for our 8-year-old daughter, who plays with a mix of 18-inch dolls and smaller dolls. We knew she wouldn’t be able to resist crawling inside it, so he mounted it to the wall.
We like the idea of a dollhouse that will evolve into a bookshelf once she has replaced these toys with the 3D-printed tabletop variety.
Adults don’t stop playing with dolls. We just give them armor and spell resistance.
Devon’s build is adapted from the one on Ana White. He made a few changes, including the addition of roofing that he cut on our Glowforge. Over the next year, I will work with our daughter to decorate the inside.
MAKER MONDAY: Double, double, toil and trouble

We thought it would be fun to show you some of the projects we’re working on that aren’t related to 3D-printable gaming terrain. This curio is a work in progress, but it’s coming along nicely.
Most of this project consists of found items. We inherited the curio itself from Devon’s grandmother, and he removed the doors. The wands and other ceremonial items are from my collection, and we decorated bottles to look like potions. Some of the bottles are from our craft-supply stash, while others came from a trip to a Denver-area vintage/antiques store called Brass Armadillo. The skull on top is my good friend Steampunk Bob, who used to hold Crystal Head vodka. We gave him a makeover with Tim Holtz Alcohol Inks and a 3D-printed eye patch.
The coolest part is the glowing bottle on the top left. Devon filled it with mineral oil — which is non-conductive — and fairy lights, which he wired into the wall behind the curio so we never have to change batteries.
NEW RELEASE: When the walls are closing in, print a door
“When God closes a door, he opens a window, but it's up to you to find it.” — author Jeanette Walls
Windows aren’t good alternatives to doors unless you’re breaking and entering. And what happens if God opens a window on the 10th floor? Also, closing the door and hiding the window seems like a dick move, but who am I to question God?
But I digress. This post is about terrain.
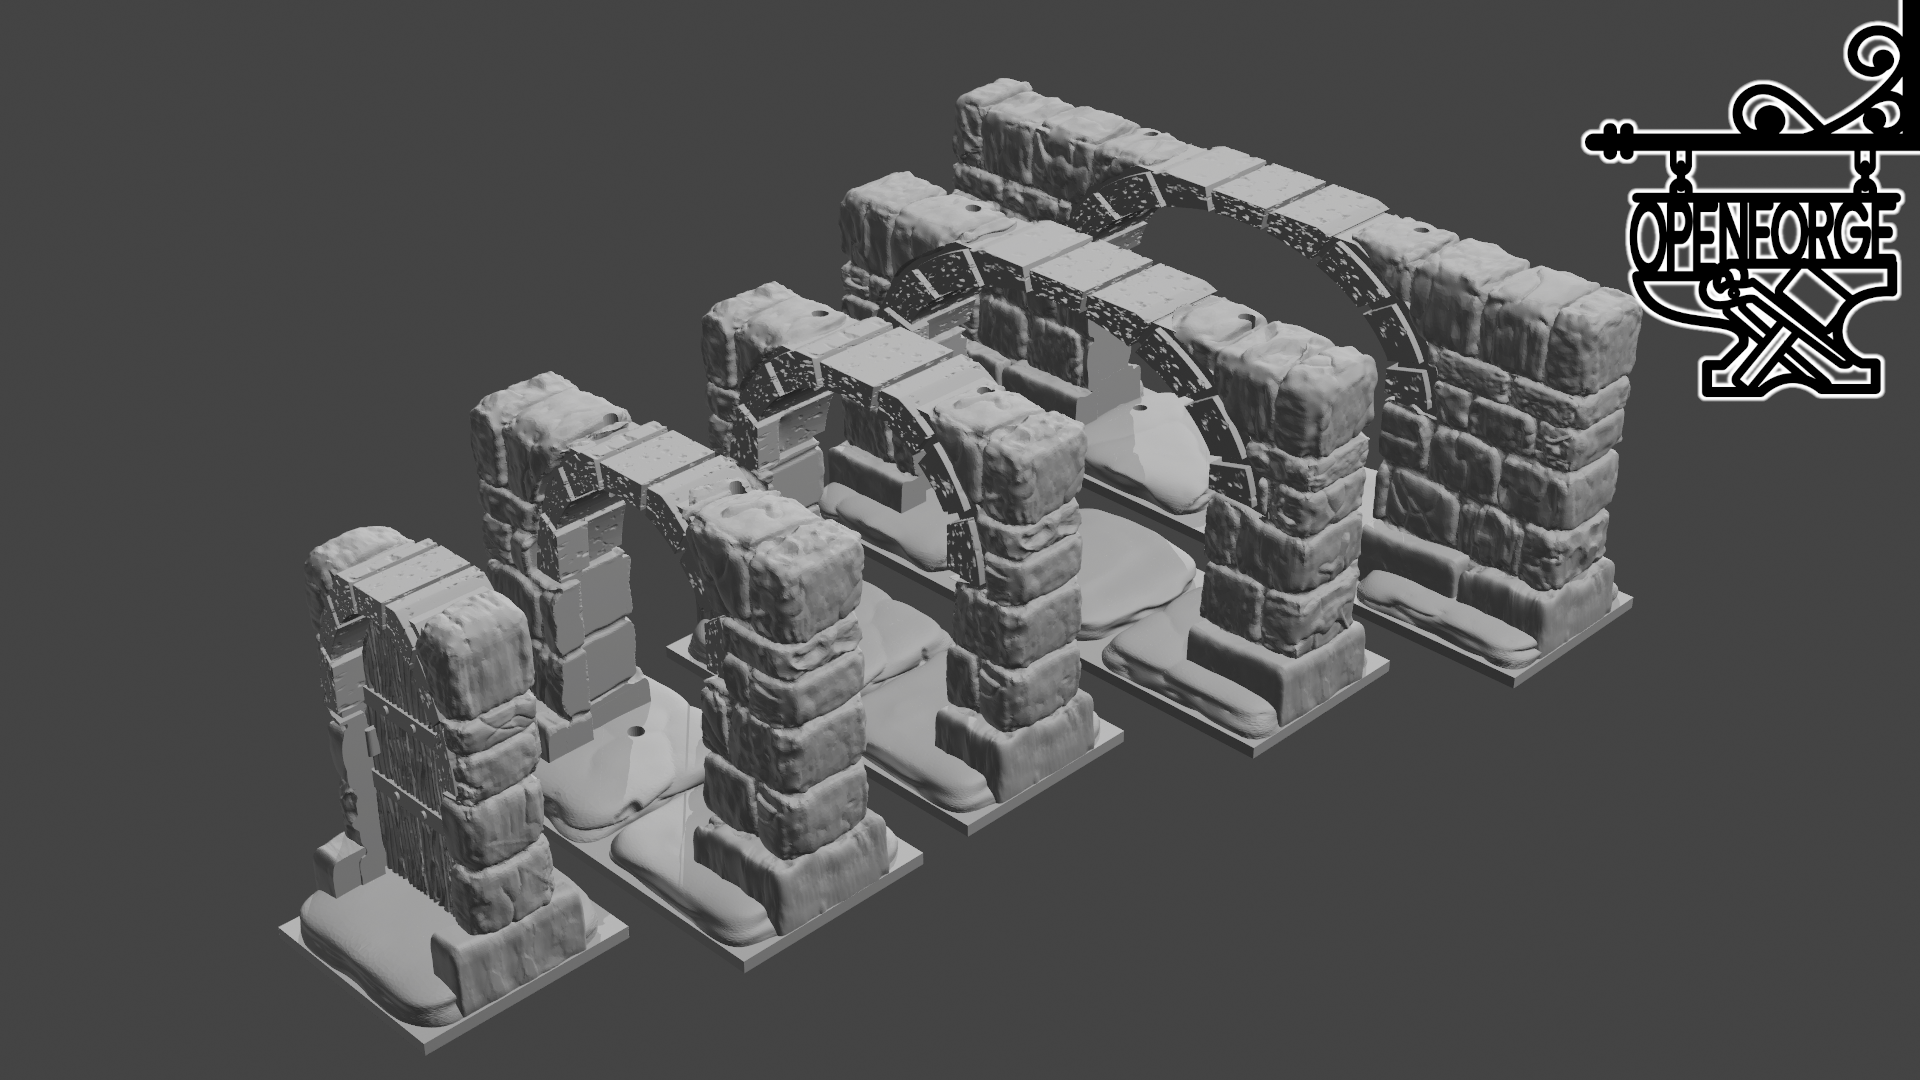
Check out Devon’s new release, which expands on the S-Series by adding a full set of doors and windows. He also updated the existing dungeon stone set with 1-inch wide arched windows and doors.
Visit our Patreon page for details and links to the free files.
Get in, gamers! We're doing bug stuff!
Welcome back, gamers and makers! We’re eager to get back to showing you some of the fun things we’re doing -- and hear about how you’ve been occupying yourselves during a hard couple of years.
Our games shifted entirely online at the start of the pandemic, so creating terrain for in-person games we couldn’t play has been both sad and an exercise in hope. But we’re about to start an in-person Starfinder campaign (Attack of the Swarm) with a few friends, and we couldn’t be more excited to be playing games in meatspace again.
Devon and a friend have been working on a dice-roller app. It’s not ready for primetime yet, so I won’t link to it, but I’ll keep you updated. It’s been useful for complicated high-level rolls, making our high-level campaign run much more smoothly online.
Devon has been maintaining his regular monthly schedule releasing 3D-printable terrain files. You can find them for free at Thingiverse and MyMiniFactory. If you like them, please consider supporting our Patreon.
If you’re playing online, what apps are you using? We’re using Miro for our tabletop and Zoom for communication. These apps allowed us to complete Skulls & Shackles, a Pathfinder campaign that ran for three years. Online gaming is better than no gaming.